Want to know how a wedding photographer optimizes his photos for Facebook and Instagram? Have you ever wondered why your photos sometimes look blurry or of poor quality after uploading them online? How to upload your photographs for your Facebook and Instagram accounts with preserved image quality? Read the post to the end and you will see the answers to these questions 🙂
1. Settings in the Facebook mobile application
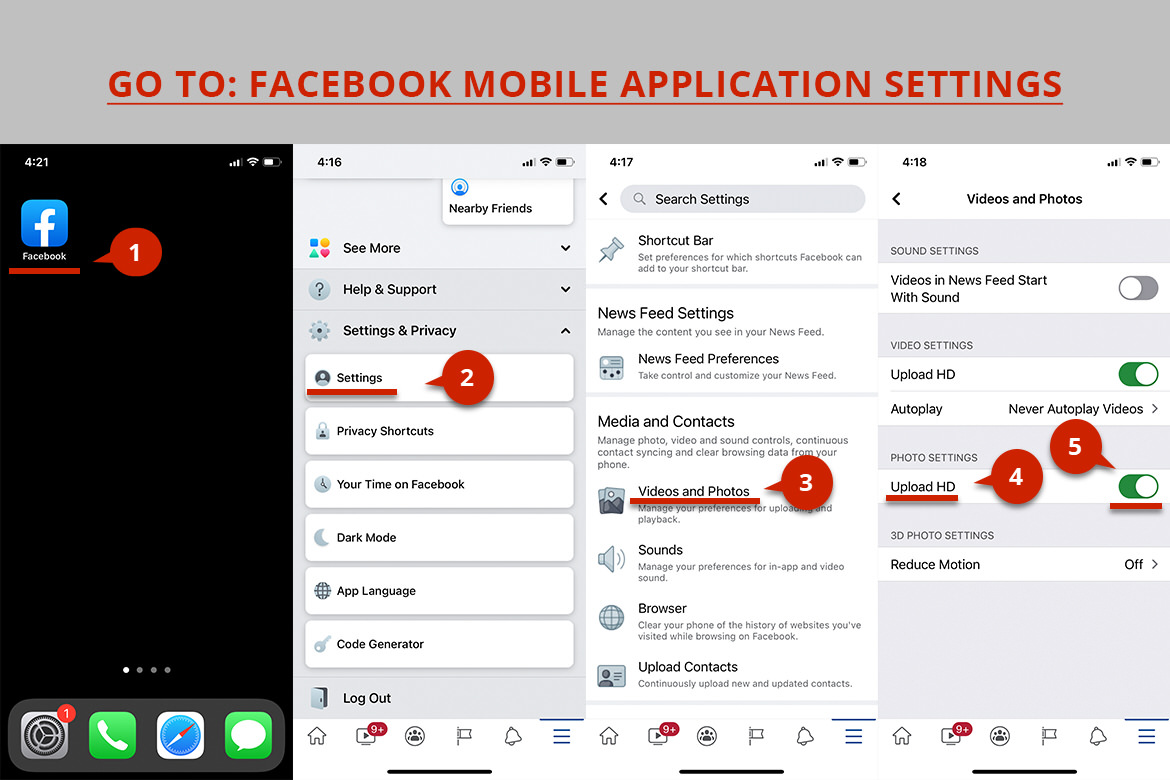
The first thing you need to do is enter the settings of the Facebook mobile application and check the box for higher image quality (Upload HD).
From my experience I would advise the images to have the best quality, to always upload them from a desktop computer / laptop. When uploading images from a mobile device, I’ve noticed that the quality of the photos is deteriorating.
2. Resize the image in Photoshop or another photo editing program
I guess many of you will think that the program is too complicated or have not used it so far … But do not worry and despair! What I will show in the following example contains relatively simple operations. And if you wish, by analogy you can use another photo editing program and perform the following steps to resize the images.
I recommend using a size 2048px on the long side of the image in a 3:2 aspect ratio (width:height) or a square with a side of 2048px. There are two reasons to choose 2048px on the long side:
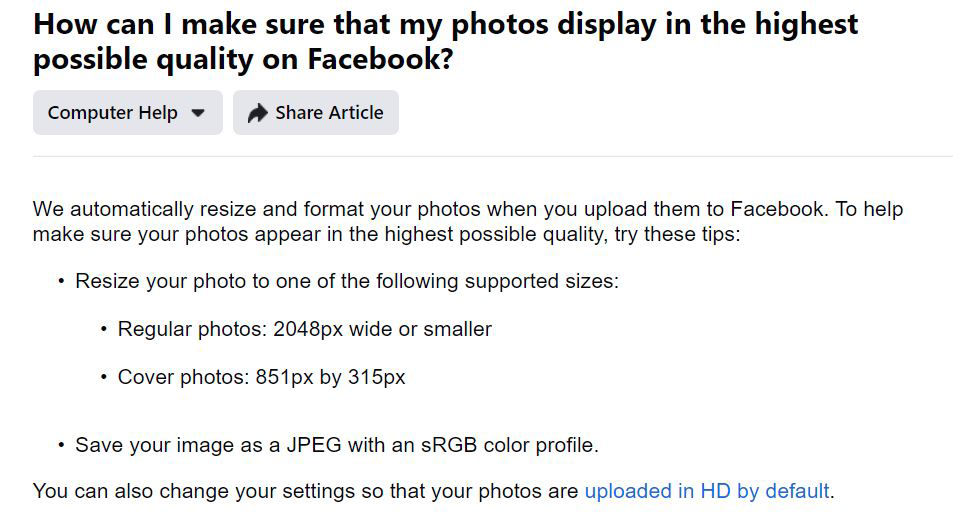
- one of Facebook’s official recommendations is exactly 2048px for standard photos. source
- when you double-click on the display of a modern smart phone, when viewing photos, you will enter the zoom function and still the image will look sharp and in focus, not blurred. The reason is that the image has a sufficient physical size in pixels and can be scaled easily (zoom in / zoom out) without deteriorating the image visibly.
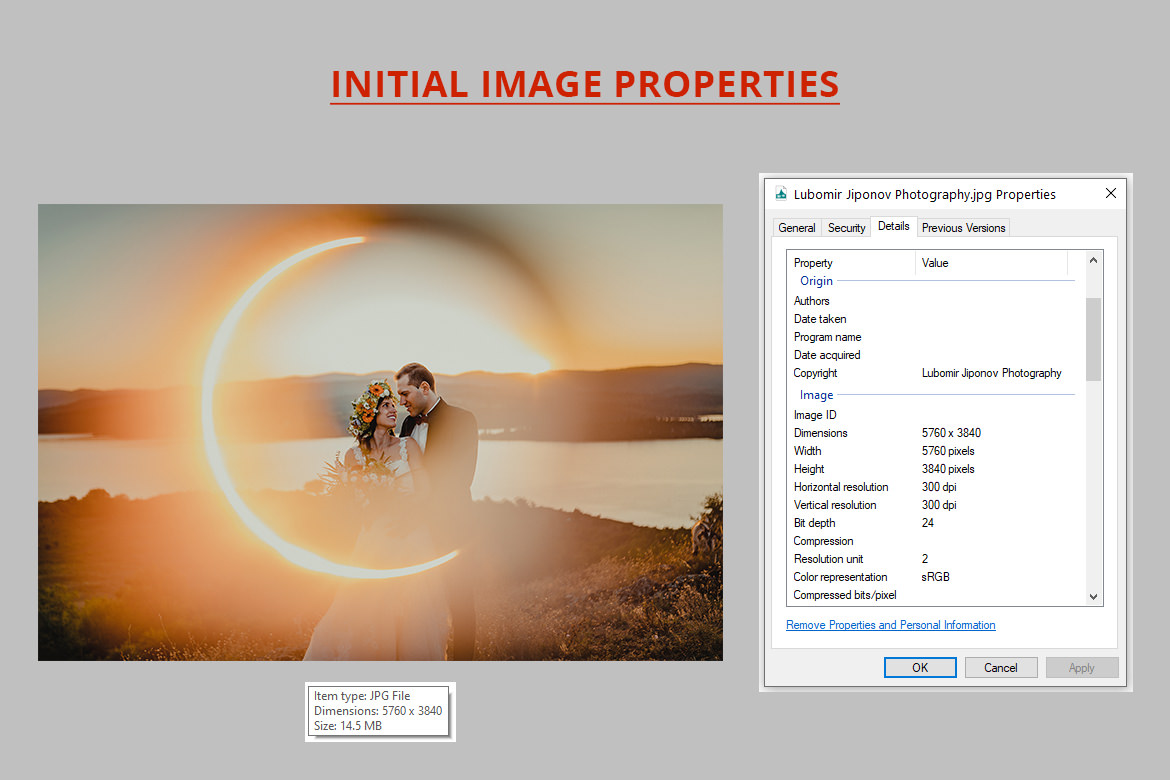
In the photo that I have shown as an example below the text, it can be seen that it measures 5760 x 3840 pixels at a resolution of 300 DPI, in sRGB color space, the size of the photo is 14.5 MB. To upload images online, use the .jpg image format.
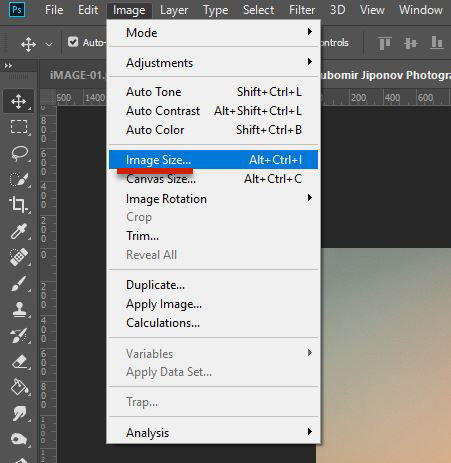
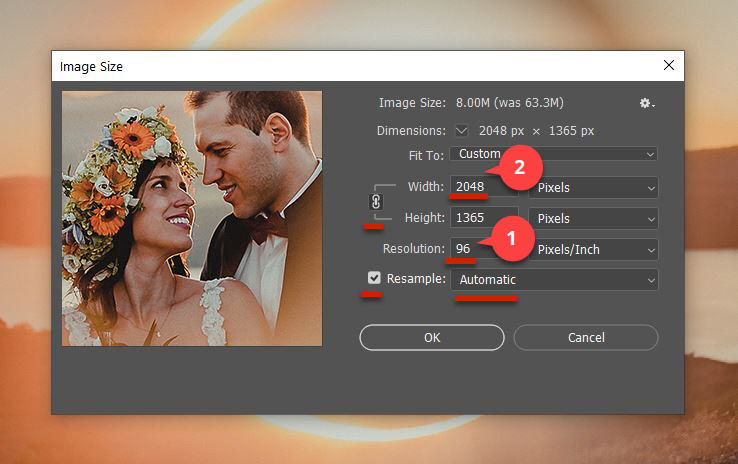
In the program Photoshop you need to do the following steps to resize the image so that you can then upload it to Facebook.
- Image >> Image Size…
» 2048 х 1365 px (3:2);
» Resolution: 96 px/in;
» Resample (tick ✓): Automatic - Save As options: Color profile ICC Profile: sRGB IEC 61966-2.1 (tick ✓)
- Save as type: .jpg or .jpeg
- JPEG options:
» Quality – 12 (maximum);
» Format – Baseline (“Standard”)
Did you know that: If you divide 5760 pixels / 3840 pixels you will get 1.5. The 1.5 factor comes from the 3:2 aspect ratio (standard when shooting with cameras), which I just mentioned. The good thing is that you don’t have to do any calculations in the program. Rescaling is automatic, when only width or height is set. Let’s see all this happens in the example below:
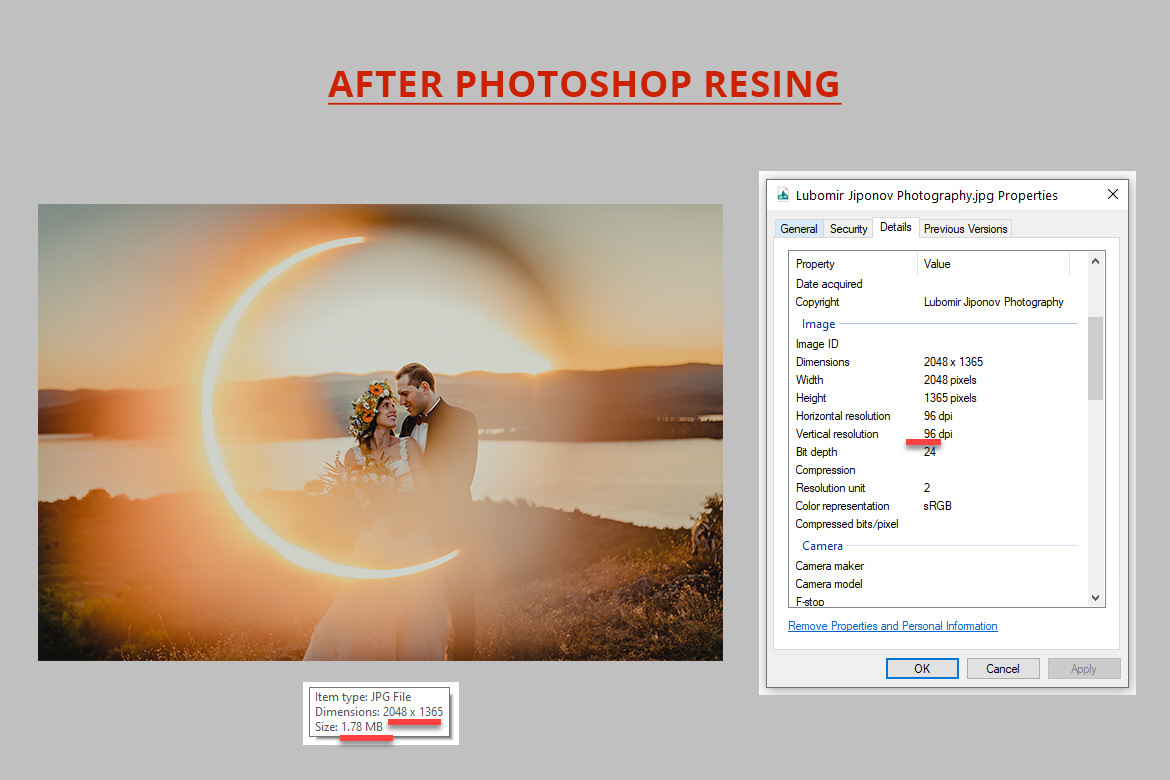
Once we have reduced the image to the appropriate file format, size and volume, it looks like this:
Item type: JPG File
Dimensions: 2048 x 1365 pixels
Size: 1.78 MB
You will notice that after resizing, the 14.5 MB image has initially become 1.78 MB ~ approximately 8 times smaller than the original file size.
3. Using the program JPEGmini Pro
How can we further reduce the size of the file (image) so that it becomes even smaller? The answer to this question is simple – through the program JPEGmini Pro. Image optimization is thanks to developed by JPEGmini technology, which reduces the size of the photo file without compromising its quality. Doesn’t that sound great? 🙂 During the test with our example we came to the point where the photo after processing in Photoshop, has reached a file size of 1.78 MB. Through the JPEGmini Pro program, the photo reaches a fantastic 490 KB file size without visibly compromising image quality. The difference before and after going through the program is approximately ~ 3.63 times the reduction of the physical size of the photo. Usually a few hundred kilobytes is an acceptable file size for your photos before they are uploaded online.
Our photo after this short optimization process is ready to upload online. Keep in mind when uploading images on Facebook that there may be an option to check the upload quality for photos in some places – always put tick ✓ “High quality”.
4. Quick reference of the whole optimization process
- Facebook mobile application >> Photos ✓ Upload HD
- Upload images from a computer
- Photoshop settings:
» 2048 х 1365 px (3:2)
» Resolution: 96 px/in
» Resample (tick ✓): Automatic
» Save As: ICC Profile sRGB IEC 61966-2.1 (tick ✓)
» Type format: .jpg
» Quality: 12 (maximum)
» Format – Baseline (“Standard”) - Using JPEGmini Pro program
- If a photo quality option appears when uploading: ✓ “High quality”
5. Bonus tip: optimize photos for Instagram
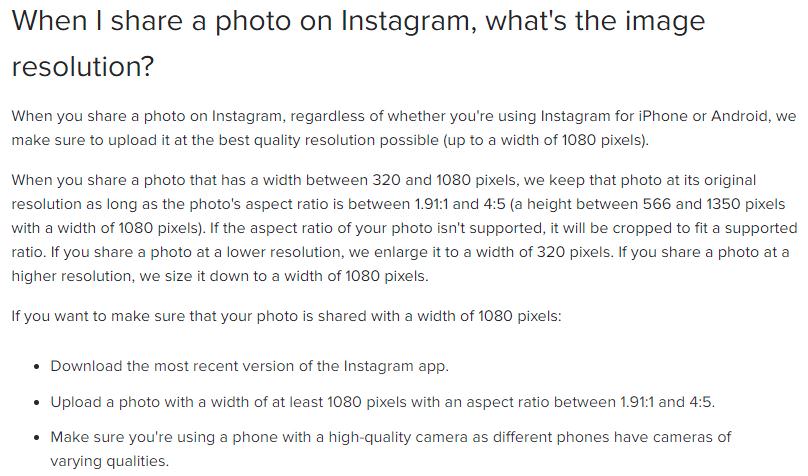
The process of optimizing photos for the social network Instagram is exactly the same as the method described above, with the difference that it uses 1080px on the long side of the image.
- Photoshop settings:
» 1080 х 720 px (3:2)
» Resolution: 96 px/in
Intriguing: If you wish, I can make a detailed post about the whole process of optimizing, resizing and uploading images for Instagram (because there are specifics and tricks). You can write to me on Instagram under the post for “Optimizing photos for social networks Facebook and Instagram”.
Other interesting articles:
“Top 3 best places for a wedding photo shoot in Sofia”
“Award winning wedding photography – 1st place in season 2018”


