

Every photograph begins with light.
Before composition, color, and the decisive moment, the camera must receive enough light to create an image. The amount of light that reaches the sensor, together with the way the camera records that information, determines the exposure of the photograph.
When the exposure is insufficient, the image may appear too dark. When the exposure is excessive, important highlights may lose detail. But exposure is not simply a matter of making a photograph brighter or darker. It is a way to control motion, focus, atmosphere, and the viewer’s attention. For a beginner photographer, understanding ISO, Aperture, and Shutter Speed is the first real step beyond Auto mode. This is the point at which the camera gradually stops making every decision for you and becomes a tool through which you shape the image.
In this article, we will explore exposure in a clear and practical way – without unnecessary theory, without complicated formulas, and with examples you can try straight away.
This topic is also a fundamental part of my Beginner Photography Course in Sofia, where we move from explanation to real, hands-on work with the camera, light, and motion.
What Is Exposure in Photography?
Exposure determines how bright or dark an image appears and how much information is preserved in its highlights and shadows. When too little light reaches the sensor, this is called underexposure. The photograph may appear too dark, with important details missing from the shadows. When too much light reaches the sensor, this is called overexposure. The brightest areas may become completely white, causing the information in them to be lost.
Between these two extremes lies the exposure that best represents the scene and matches your intention. This does not mean that every good photograph must have an average, evenly balanced brightness. A portrait beside a window may look bright and airy. A silhouette at sunset may be intentionally dark. A night scene should not look as though it were photographed at midday.
Good exposure is not simply technically correct brightness. It is the brightness that supports the idea behind the photograph while preserving the important visual information.
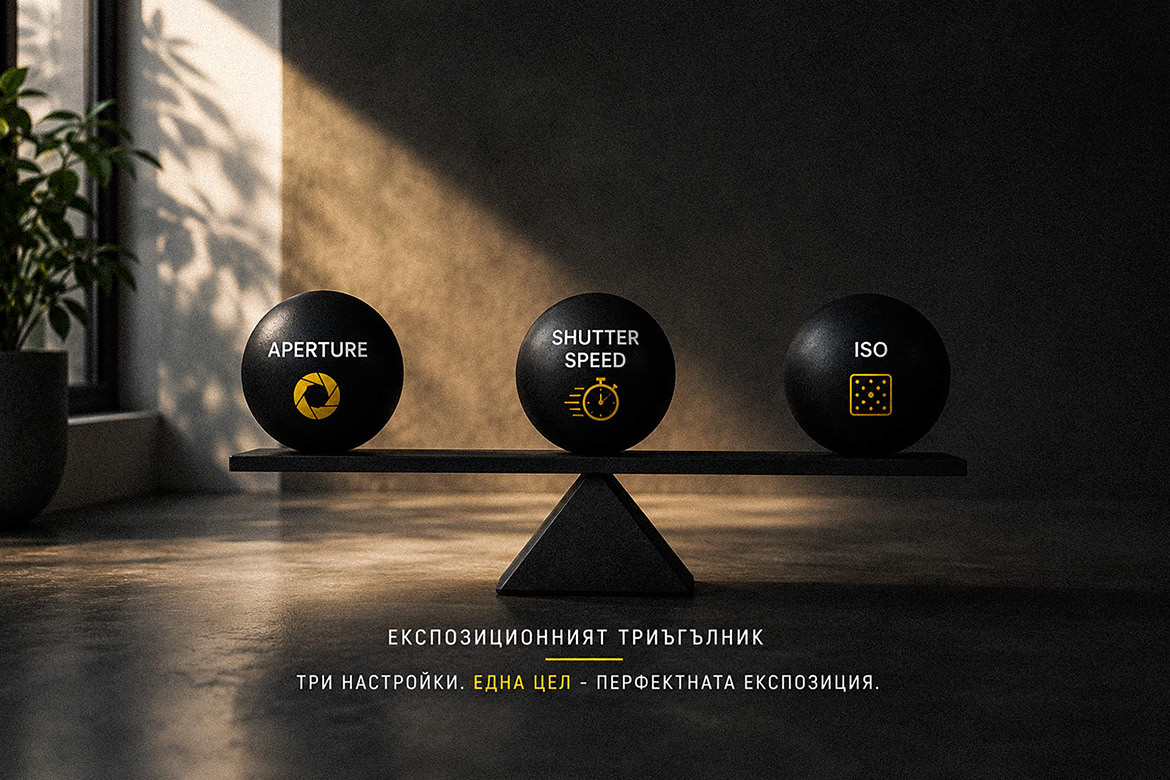
The Exposure Triangle: ISO, Aperture, and Shutter Speed
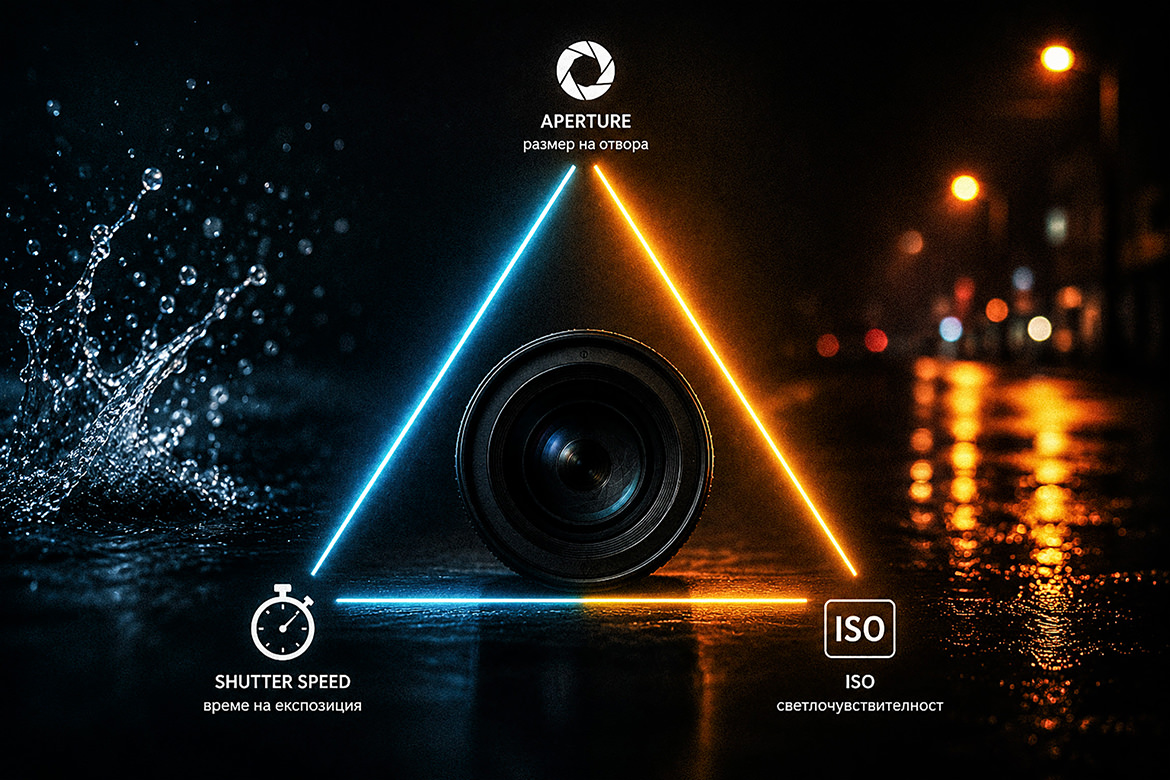
Exposure is controlled through three main settings:
- ISO – determines how strongly the camera amplifies the recorded light signal;
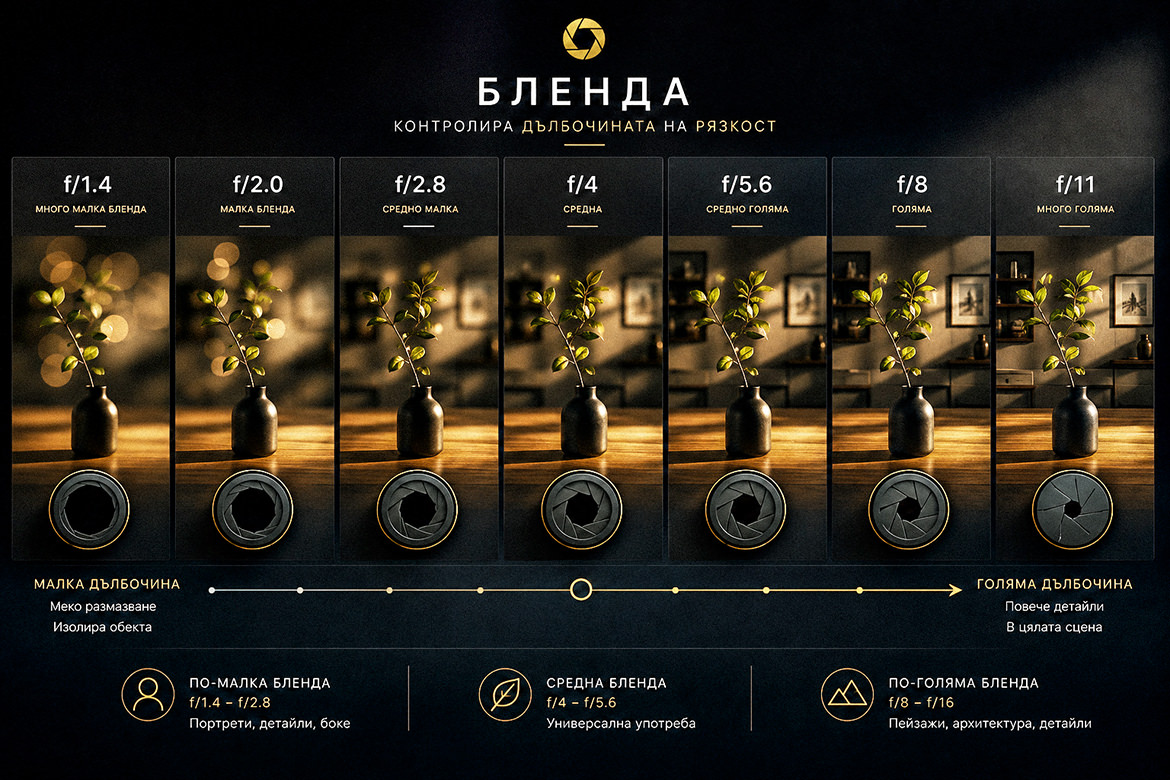
- Aperture – determines the size of the opening inside the lens and affects depth of field;
- Shutter Speed – determines how long the sensor records light and how motion appears in the image.
These settings are often presented as the exposure triangle. The idea is practical: when you change one setting, you often need to adjust another in order to maintain the desired brightness.
However, the three settings are not interchangeable. They can produce a similar level of brightness, but they will not create the same photograph. Changing ISO affects image quality and digital noise. Changing the aperture affects how much of the scene appears sharp. Changing the shutter speed affects how motion is recorded. For this reason, do not search for one magical combination of numbers. Look for the settings that are right for the specific light, subject, and photographic idea.
ISO: Brightness, Image Quality, and Digital Noise
In digital photography, ISO determines how strongly the camera amplifies the signal recorded by the sensor.
Common ISO values include:
- ISO 100;
- ISO 200;
- ISO 400;
- ISO 800;
- ISO 1600;
- ISO 3200;
- ISO 6400;
- ISO 12800.
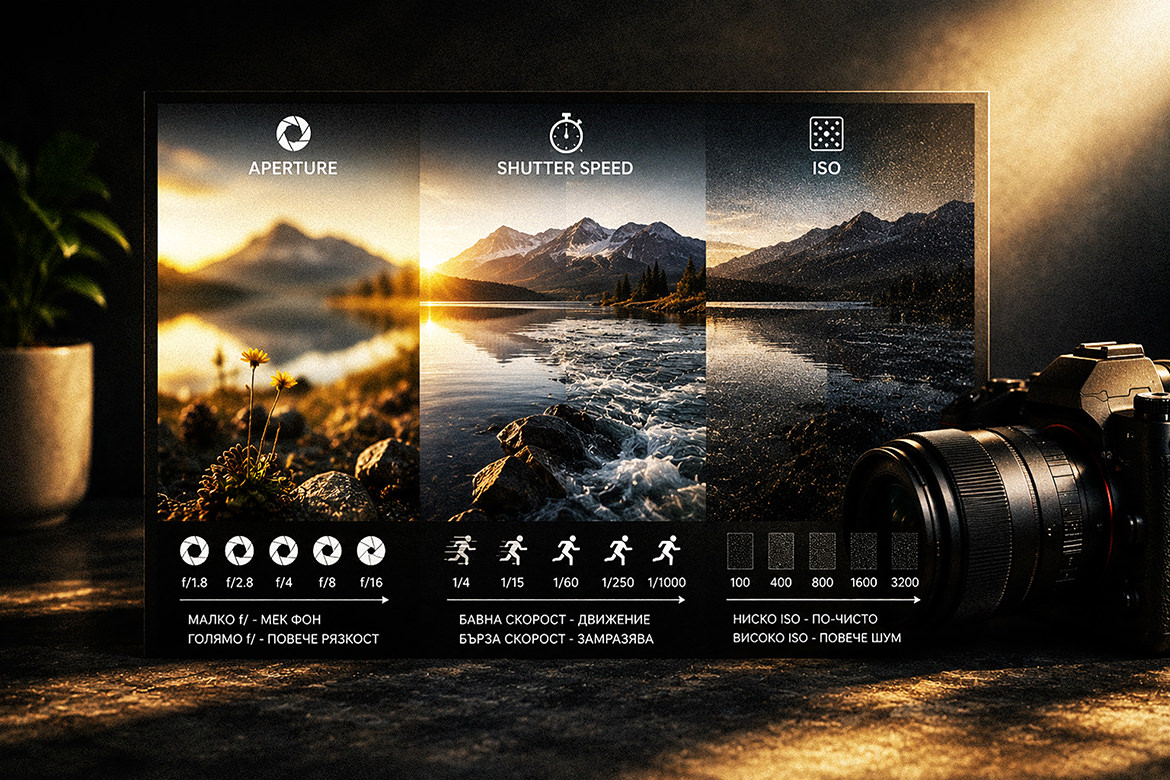
When you increase ISO, the image becomes brighter at the same aperture and shutter speed. This allows you to photograph in lower light or use a faster shutter speed. However, ISO does not increase the physical amount of light passing through the lens. The light reaching the sensor is determined mainly by the aperture, shutter speed, and the scene itself. ISO amplifies the recorded signal and changes how brightly the camera presents it.
Low ISO
Low values such as ISO 100 and ISO 200 usually provide:
- a cleaner image;
- less digital noise;
- finer detail;
- smoother tonal transitions;
- greater flexibility in post-processing.
Low ISO is suitable when there is enough available light or when you are photographing a static scene with a tripod – for example, a landscape, architecture, product photography, or a portrait beside a well-lit window.
High ISO
Higher ISO is useful when photographing in the evening, indoors, at an event, or when the subject is moving and you need a faster shutter speed. The trade-off may be more digital noise, less fine detail, and less flexibility when strongly brightening the shadows in post-processing. This does not mean that high ISO is a mistake. In many situations, it is the right choice.
It is better to have a sharp photograph with slightly more noise than a technically clean but blurred image.
Noise can often be reduced in post-processing. Severe motion blur or a missed moment usually cannot be recovered.
How to Choose ISO
Start with the lowest practical value that still allows you to use the aperture and shutter speed you need. Do not choose ISO 100 at all costs.
Increase ISO when:
- there is not enough light;
- the shutter speed becomes too slow;
- the subject is moving;
- you are shooting handheld and there is a risk of blur.
It is useful to run your own test and discover the highest ISO value at which your camera still produces a level of quality you are comfortable with. The result should be evaluated according to the image’s intended use, not only at extreme magnification on a computer screen.
Aperture: How Aperture Controls Light and Focus
The aperture is the opening inside the lens through which light reaches the sensor. It is expressed as the letter f followed by a number:
- f/1.4;
- f/2.0;
- f/2.8;
- f/4;
- f/5.6;
- f/8;
- f/11;
- f/16.
With aperture, the logic may seem reversed:
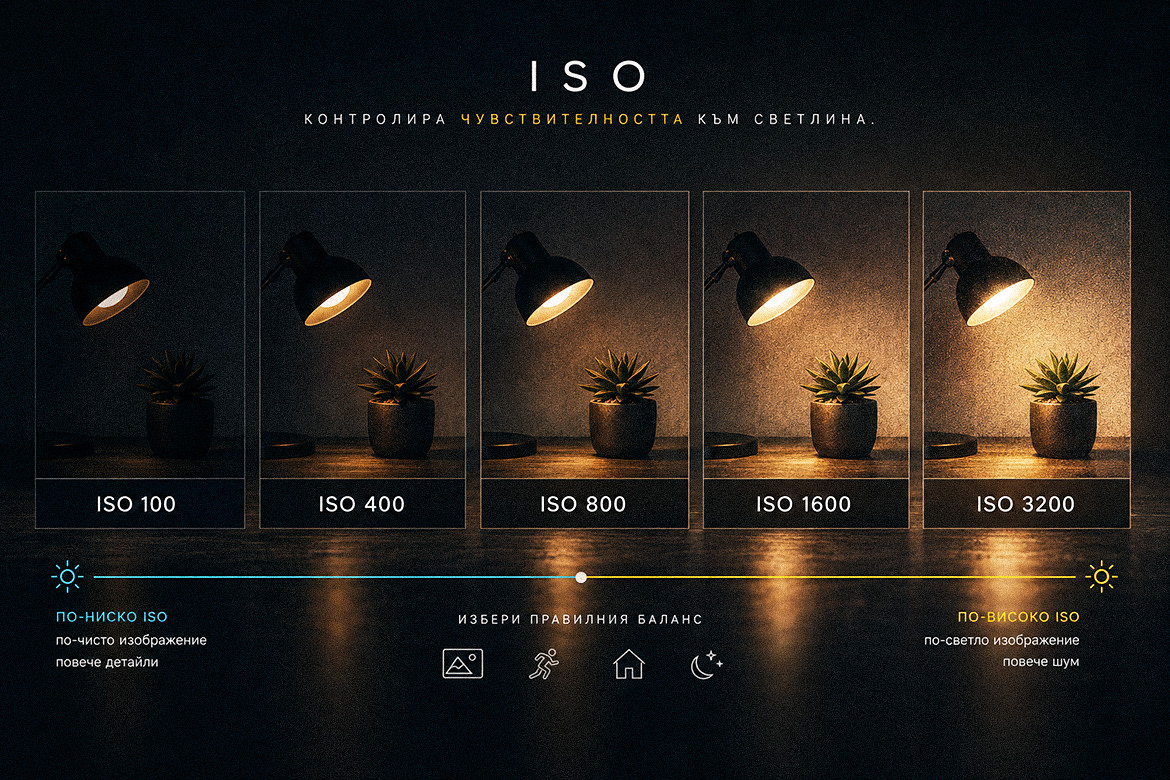
- a smaller f-number means a wider opening and more light;
- a larger f-number means a narrower opening and less light.
For example, f/1.4 is a wider aperture than f/8.
Wide Aperture
Settings such as f/1.4, f/2, and f/2.8 allow more light to enter and often create a shallow depth of field. The subject can remain sharp while the background appears soft and blurred.
This is useful for:
- portraits;
- indoor photography;
- events in low light;
- separating the subject from the background;
- directing attention to a specific detail.
However, a wide aperture requires more precise focusing. In a portrait photographed at f/1.4, the area of sharpness may be so narrow that one eye appears sharp while the other looks slightly softer.
The widest available aperture is not automatically the best choice. Sometimes f/2.8 or f/4 will produce a more reliable and meaningful result.
Narrower Aperture
Settings such as f/8 and f/11 allow less light to enter, but they can keep a larger part of the scene acceptably sharp.
They are often suitable for:
- landscapes;
- architecture;
- interiors;
- group photographs;
- scenes with important subjects at different distances.
You do not need to close the aperture all the way. Very high f-numbers such as f/16 or f/22 can soften fine details because of an optical effect known as diffraction.
What Is Depth of Field?
Depth of field is the area in front of and behind the point of focus that appears acceptably sharp in the image.
A shallow depth of field leaves only a limited part of the scene in focus. A deep depth of field keeps more of the space sharp and recognisable. Aperture is an important factor, but it is not the only one. The result is also influenced by:
- the distance between the camera and the subject;
- the focal length of the lens;
- the distance between the subject and the background;
- the size of the sensor.
The closer you are to the subject, the shallower the depth of field usually becomes. The farther the background is from the subject, the softer it can appear. This means that a beautiful blurred background does not depend solely on owning an expensive lens. You can often improve the result by moving the camera closer to the subject, increasing the distance between the subject and the background, or choosing a more suitable shooting position.
The Background Is Part of the Story
A blurred background is not automatically a good background. Even when it is out of focus, it still affects the image through its colours, lines, bright areas, and contrast. Before pressing the shutter button, check whether there is a pole, a bright object, or a line directly behind the person’s head. Sometimes a small change in position creates a cleaner photograph than changing any camera setting. Also consider whether the environment is important to the story. In a photograph of a musician on stage, a craftsperson in a workshop, or a family in their home, the background can provide valuable context. You do not always need to turn it into an unrecognisable blur.
Shutter Speed: How Shutter Speed Controls Motion
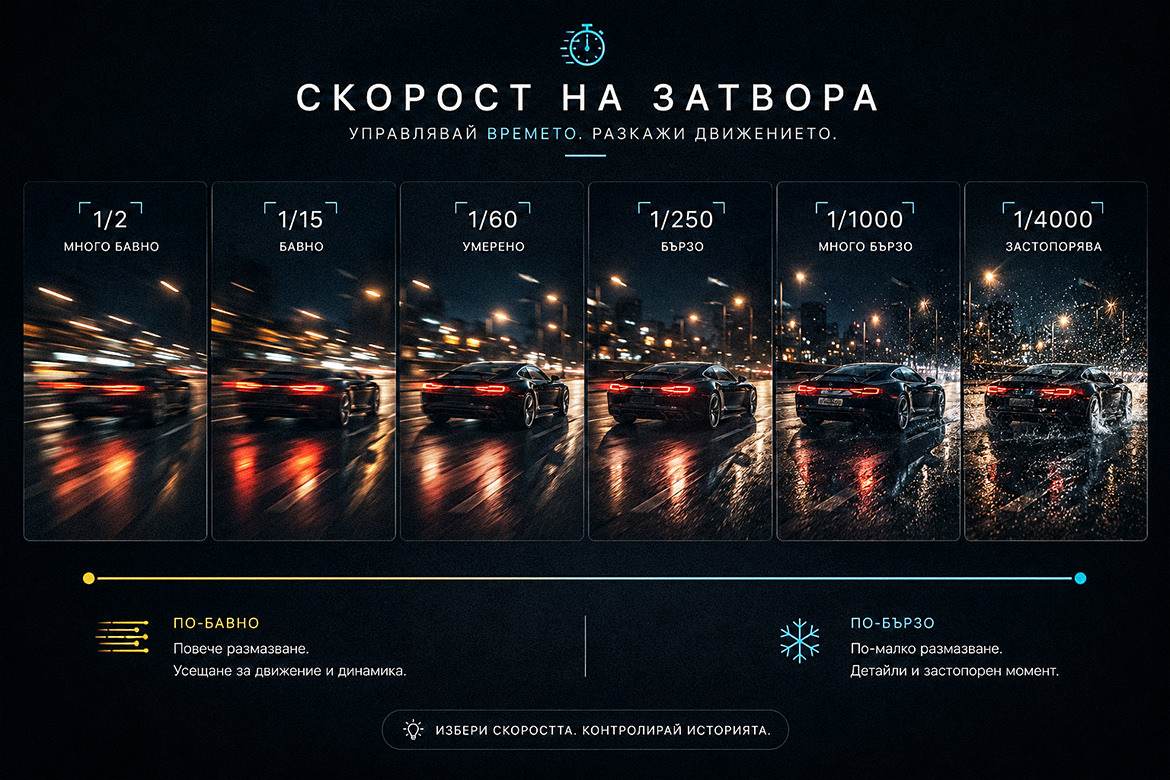
Shutter speed determines how long the camera sensor records light when creating a photograph.
It is measured in seconds or fractions of a second:
- 1/2000 second;
- 1/1000 second;
- 1/500 second;
- 1/250 second;
- 1/125 second;
- 1/60 second;
- 1/30 second;
- 1 second;
- 10 seconds.
For values written as fractions, a larger number beneath the line indicates a faster shutter speed. Therefore, 1/1000 second is faster than 1/125 second.
Fast Shutter Speed
A fast shutter speed captures a very brief moment. It allows less light to reach the sensor, but it can freeze motion.
It is suitable for:
- sports;
- people running;
- children playing;
- animals and birds;
- dancing;
- moving vehicles;
- splashes and falling water;
- quick gestures and fleeting moments.
There is no single shutter speed that can freeze every type of movement. The required setting depends on the speed, direction, and distance of the subject, the lens being used, and how you want the motion to appear.
Slow Shutter Speed
A slow shutter speed allows the sensor to record light for longer. It lets in more light, but it also increases the likelihood of motion appearing blurred. This blur may be an unwanted mistake, but it can also be an intentional creative choice.
With a slow shutter speed, you can create:
- a sense of movement;
- soft, flowing water;
- light trails from vehicles;
- blurred human figures;
- movement in the clouds;
- abstract shapes and lines.
The question is not only “How can I freeze the motion?”. The more important question is “How do I want motion to appear in this photograph?”.
Two Different Types of Blur
When a photograph is not sharp, you need to identify the cause.
Subject motion blur occurs when a person, animal, or object moves during the exposure. The usual solution is to use a faster shutter speed.
Camera shake occurs when the camera moves during the exposure. In this case, the entire image may appear soft, including the stationary background.
For steadier handheld shooting:
- hold the camera with both hands;
- support the lens with your left hand;
- keep your elbows close to your body;
- press the shutter button smoothly;
- lean against a stable surface whenever possible;
- increase ISO if the shutter speed is too slow.
Image Stabilization Does Not Freeze the Subject
Image stabilization in the camera or lens helps compensate for small movements made by the photographer. It cannot freeze a moving person. The background may remain sharp while the person appears blurred. In this case, the camera was stable enough, but the shutter speed was not fast enough for the movement of the subject.
Suggested Starting Shutter Speeds
The following values are starting points, not universal rules:
- still portrait – approximately 1/125 to 1/320 second;
- person walking – approximately 1/250 to 1/500 second;
- children playing – approximately 1/500 to 1/1000 second;
- dancing and dynamic events – approximately 1/320 to 1/800 second;
- running and sports – approximately 1/1000 second or faster;
- panning – approximately 1/15 to 1/125 second, depending on the movement;
- light trails and long exposures – several seconds or longer with a tripod.
Take a test photograph and inspect the eyes, face, hands, and other important details at a larger magnification. If you notice unwanted blur, use a faster shutter speed.
How ISO, Aperture, and Shutter Speed Work Together
Approximately the same level of brightness can be achieved through different combinations of settings.
For example, you can use:
- a wide aperture and a fast shutter speed;
- a narrower aperture and a slower shutter speed;
- low ISO when there is enough light;
- higher ISO when light is limited.
The photographs may appear equally bright, but they will not look the same.
In one image, the background may be blurred. In another, more of the scene may be in focus. One photograph may freeze motion, while another turns it into a visible trail. One may be technically cleaner, while another may contain more digital noise.
Exposure is not only about controlling brightness. It is about controlling light, motion, space, and image quality.
What Is One Stop of Exposure?
Changes in exposure are measured in steps known as stops.
One full stop represents a doubling or halving of the brightness produced by a particular setting.
Examples:
- from ISO 100 to ISO 200 – an increase of one stop;
- from 1/250 to 1/125 second – twice the exposure time and one stop more light;
- from f/4 to f/2.8 – one stop more light through the lens.
This allows you to compensate for a change in one setting by adjusting another.
For example, you may want to change from 1/250 to 1/500 second to freeze motion. The faster shutter speed allows half as much light to reach the sensor. To maintain a similar brightness, you can open the aperture by one stop or increase ISO by one stop. You do not need to calculate everything mechanically for every photograph. With practice, you will begin to recognize these relationships almost intuitively.
How the Camera Measures Light
The camera has a built-in light meter. In Manual mode, you will usually see a scale with negative values, zero, and positive values (-3 -2 -1 0 +1 +2 +3).
- an indicator toward the negative side suggests a darker image;
- an indicator toward the positive side suggests a brighter image;
- an indicator around zero shows the brightness the camera considers balanced.
This is a recommendation, not a final decision.
The camera does not know whether you are photographing a bright snowy scene, black clothing, a silhouette, or a brightly lit face against a dark background. It measures the light, but it does not understand your intention. In a very bright scene, the camera may try to make the image too dark. In a very dark scene, it may try to brighten it more than you want.
The camera measures. The photographer decides.
Use the light meter as a starting point, take a test photograph, and check the actual result.
Manual, Aperture Priority, and Shutter Priority
You do not need to shoot exclusively in Manual mode. Different modes are tools for different situations.
Manual – M
In Manual mode, you choose the aperture, shutter speed, and ISO, unless you are using Auto ISO. It is suitable for consistent lighting conditions when you want complete and predictable control.
Aperture Priority – A or Av
You choose the aperture, while the camera determines the shutter speed according to the measured light and selected ISO. This mode is useful for portraits, landscapes, street photography, and product photography when depth of field is the main creative decision. Keep an eye on the shutter speed. If it becomes too slow, increase ISO or open the aperture.
Shutter Priority – S or Tv
You choose the shutter speed, while the camera determines the aperture. This mode is useful for sports, children, vehicles, dancing, moving water, and panning. If there is not enough light and the lens has already reached its widest aperture, increase ISO or choose a slightly slower shutter speed.
Manual with Auto ISO
In dynamic situations, you can select the shutter speed and aperture manually while allowing the camera to adjust ISO according to the light. This is practical when a person moves between sunlight and shade, when you are photographing an event, or when both motion and depth of field need to remain consistent. Auto ISO is not a sign of limited skill. When configured thoughtfully, it is a controlled and useful tool.
Practical Settings for Different Situations
Portrait of One Person
A possible starting point:
- an aperture between f/1.4 and f/4, depending on the distance and desired background;
- a shutter speed of approximately 1/125 to 1/500 second for natural movement;
- ISO according to the available light.
Focus on the eye closest to the camera. If the depth of field is too shallow, close the aperture slightly.
Two People or a Small Group
A possible starting point:
- f/3.2 to f/8, depending on how the people are arranged;
- a shutter speed of at least approximately 1/200 or 1/250 second;
- ISO according to the available light.
Position the faces as close as possible to the same focal plane. If one person is significantly closer to the camera, they may remain sharp while the others fall outside the depth of field.
Children Playing
Start at approximately 1/500 second. For running, you may need 1/800, 1/1000 second, or faster.
Choose an aperture that provides sufficient depth of field and increase ISO according to the available light. Do not be afraid of a higher ISO when it helps you keep expressions and movement sharp.
Landscape
A possible starting point:
- ISO 100 or the camera’s base ISO;
- an aperture around f/8 or f/11;
- a shutter speed appropriate for the available light;
- a tripod when the shutter speed becomes too slow for handheld photography.
Not every landscape needs to be sharp from the nearest rock to the horizon. Sometimes a wider aperture and a clearly chosen foreground subject create a stronger photograph.
Indoor Photography or Event Photography
First choose the shutter speed required for the movement of the people. Then select an appropriate aperture and increase ISO until you achieve the necessary brightness. In this type of situation, a sharp emotional moment with slightly more noise is usually more valuable than a clean but blurred image.
Check More Than Just Brightness
A photograph may appear bright enough but still be unsuccessful because of a shutter speed that is too slow, inaccurate focus, or lost detail in the brightest areas. After an important photograph, check:
- whether the eyes and face are sharp;
- whether there is unwanted blur;
- whether important highlights have retained detail;
- whether there is sufficient information in the shadows;
- whether the background supports the composition;
- whether the selected settings support the idea behind the photograph.
Do not rely solely on the brightness of the camera screen. It may appear different depending on the surrounding light and the display settings.
The histogram can provide more reliable information about the distribution of tones. A concentration on the left indicates more dark tones, while a concentration on the right indicates more bright tones. This does not automatically mean that there is a problem. What matters is whether information is being lost in areas that are essential to the photograph.
The Most Common Exposure Mistakes
Using ISO 100 in Every Situation
Low ISO is useful only when the available light and required shutter speed allow it. If the image is blurred, increase ISO.
Changing All Three Settings at Once
When you change everything simultaneously, it becomes difficult to understand which setting affected the result. Change one setting for a clear reason and observe its effect.
Using the Widest Aperture for Every Photograph
A blurred background is not a good enough reason for important parts of a face or group to fall outside the depth of field.
Using an Aperture That Is Too Narrow
A very high f-number allows less light to enter and can lead to a slow shutter speed, high ISO, and a loss of fine detail.
Using a Shutter Speed That Is Too Slow
Correct brightness does not compensate for unwanted blur. Check the shutter speed before every important moment.
Using an Unnecessarily Fast Shutter Speed
An unnecessarily fast shutter speed allows less light to reach the sensor and may force you to use a higher ISO. Choose a shutter speed that is fast enough, rather than automatically selecting the fastest available setting.
Following the Light Meter Mechanically
Zero on the scale does not guarantee an appropriate exposure. The light meter does not know whether you want a bright, dark, or dramatic photograph.
Ignoring the Background
The aperture can soften the background, but it cannot completely remove distracting lines, colors, and bright areas.
A Short Practical Guide to Exposure
When you encounter a new scene, follow this sequence:
- Observe the light. Where is it coming from, how strong is it, and how does it fall on the subject?
- Identify the priority. Is motion, depth of field, or the technical quality of the photograph most important?
- Choose the shutter speed. It should be fast enough for the movement or intentionally slow for the desired effect.
- Choose the aperture. Decide how much of the scene needs to be in focus.
- Set ISO. Use the value that allows you to work with your chosen aperture and shutter speed.
- Check the light meter. Use it as a starting point.
- Take a test photograph.
- Check the brightness, motion, and focus.
- Adjust only what needs to be changed.
At first, this process may feel slow. That is completely normal. Confidence does not come from memorizing every number, but from understanding why you choose each setting.
Practical Exercise: One Scene, Different Decisions
Choose a stationary object with a clearly distinguishable background – a cup, book, plant, or another subject near a window.
Take three photographs with approximately the same brightness:
- With a wide aperture and a faster shutter speed.
- With a narrower aperture and a slower shutter speed.
- With a different ISO value, compensating through shutter speed or aperture.
Then compare:
- how much of the background is in focus;
- how clearly the subject is separated from the background;
- whether there is any blur;
- where digital noise appears;
- which combination best represents your idea.
The next step is to repeat the exercise with a moving person. Use 1/125, 1/250, 1/500, and 1/1000 second in sequence. Compensate for the change in brightness through ISO or aperture and observe at which shutter speed the movement appears natural, sharp, or completely frozen.
Frequently Asked Questions About Exposure
What Is the Best ISO for a Beginner Photographer?
There is no single value for every situation. Use low ISO when there is enough light, but increase it when necessary to achieve a faster shutter speed and a sharp image.
What Aperture Should I Use for a Portrait?
For one person, you can begin between f/1.4 and f/4. The exact setting depends on the distance, lens, background, and how much of the face needs to be in focus.
What Shutter Speed Should I Use When Photographing People?
For a relatively still person, you can begin at approximately 1/125 or 1/250 second. Walking, dancing, children, or sports will require a faster shutter speed.
Should the Light Meter Always Be at Zero?
No. Zero is the camera’s assessment, not a universally correct exposure. Bright and dark scenes often require an intentional adjustment.
Is Manual Mode Always the Best Choice?
No. Manual mode is useful in consistent light and when you want complete control. Aperture Priority, Shutter Priority, and Auto ISO can be more practical in rapidly changing conditions.
Why Is My Photograph Blurred Even Though It Is Bright Enough?
The shutter speed was most likely too slow for the movement of the subject or for handheld photography. Use a faster shutter speed and compensate with a wider aperture or higher ISO.
Does Higher ISO Ruin a Photograph?
It may increase digital noise, but that does not mean the photograph is unsuccessful. The moment, focus, light, and content are often more important than absolute technical cleanliness.
From Camera Settings to Intentional Photography
ISO, aperture, and shutter speed are not three separate subjects. They are three parts of one photographic decision. ISO helps you work with the available light. Aperture determines what will appear sharp and what will remain soft. Shutter speed decides whether movement will be frozen, suggested, or transformed into a visible trail. At first, it is normal to check your settings, make several attempts, and return to the photograph to evaluate it. Over time, you will begin to anticipate the result before you even press the shutter button. At that point, exposure stops being a technical obstacle. It becomes part of your photographic language.
If you would like to learn these principles in a structured way, apply them with a camera in your hands, and receive guidance in real photographic situations, explore the photography courses with Lubomir Jiponov.
You can learn more about the Beginner Photography Course in Sofia with Lubomir Jiponov and check the upcoming photography course dates.
Before enrolling, please also review the Photography Course Terms and Conditions.
Do not search for universally correct settings. Look for the settings that are right for the light, the movement, and the photograph you want to create.
Other topics you may find interesting:
• For the Blog of Lubomir Jiponov Photography, please visit Blog.
• For media features and press coverage about me, please visit Press.
• For international recognition, please visit International awards.
• To learn more about my journey, experience, and personal style, please visit About me.
• For reviews and opinions about Lubomir Jiponov Photography, please visit Testimonials.
• To get in touch with me, please visit the Contact.